

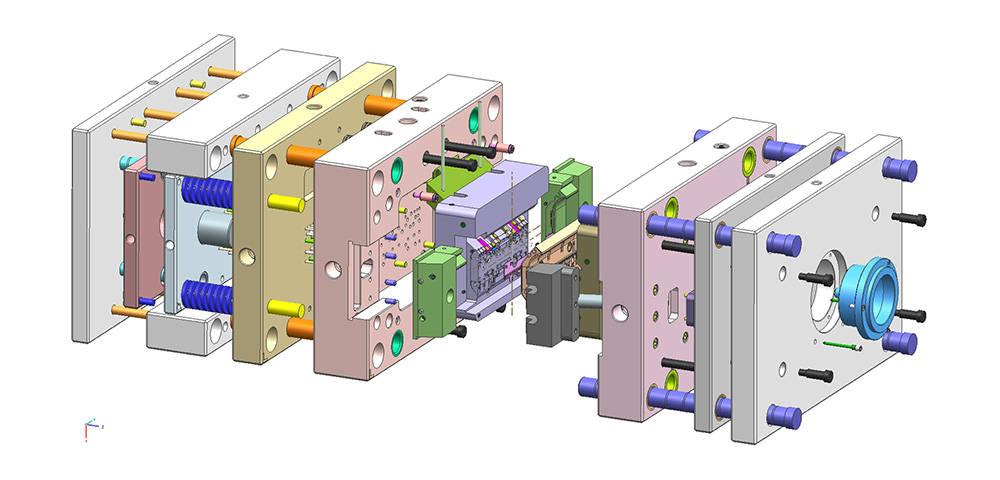
Injection moulding is the second-most common of making plastic parts, behind plastic extrusion. It involves rapid mould filling followed by quick cooling to produce objects from plasticiser. The injection mould process consumes almost 32% of the weight of all plastic!
Unsurprisingly, this means that in the injection moulding process, sometimes things go wrong. We take a look at the four most common moulding issues people face and the different solutions you can employ to solve these problems.
Voids in the Plastic Mould
Vacuum voids are caused when pockets of air are trapped inside the surface of an injection mould prototype. They commonly occur in thicker sections of material in injection moulded parts, because the molecules on the outside of the mould cool and solidify quicker than the ones in the centre of the thing being produced. As the mould cannot shrink into itself, as the outside has already cooled solid, molecules are instead pulled towards the surface of the part, which creates the internal void.
As mentioned, overly thick parts or sections of things being injection moulded typically cause these vacuum voids to form. We suggest coring out parts of your design to eliminate thick walls. This prevents large masses of materials needing to go through the process. Think carefully about the design of each part and think how to maximise the efficiency of resources to reduce volume while maintaining surface area: not only do you save on plasticiser, but you reduce the chance of voids forming.
You can also try switching to a more fluid or runny base material. This will make sure that less gas is trapped as air before cooling, and lets air escape much more quickly.
Sink Marks
Sink marks, the little unintentional recessions in your plastic mould that occur in the inner portions of your finished product, are annoying to deal with. They typically are caused by shrinkage rather than product erosion. You can tell if your product has sink marks if there are dimples or grooves on the part.
Usually, shrink marks are caused by the cooling time to be too short, meaning the plastic does not have enough time to form a firm shape of the mould. However, for the same reason, sink marks might also be caused by the cooling area being far too hot for the plastic, or that the speed of the injection speed caused the sink mark.
You should try changing the injection pressure and injection time for your object, and increasing the cooling time for your part.
Short Shot
A short shot is, simply put, a situation when the moulding shot does not completely fill the mould – in other words, the shot falls short. If this happens, the molten plastic will not fully occupy the mould cavities it is meant to, resulting in a section of the part having no plastic.
A short shot is most often caused by the mould being incorrectly calibrated or the plastic being not liquid enough. If you’re using multi-cavity moulds and all of your moulds have similar problems, you should be confident that the problem is likely your calibration. If everything is aligned correctly or the short shot is in a particularly tricky section of your mould, it is likely because the plastic is too viscous.
If it is the former, recalibrate the machine and test your setup. Hopefully, this ought to resolve the issue. If it is the latter, you need to either increase the mould or melt temperature to improve the flow of plastic, or increase the thickness of that section of the mould and increase injection time to give time for the plastic to occupy all the cavities in the short shot.
Flash
Flash is where the incredibly fluid molten plastic finds a way to escape the mould cavity, typically through a parting line or ejector pin, and cools outside of the mould of the finished product. If the mould is not clamped down with enough force, the heat and pressure of molten plastics push excess material through the mould, which later on needs to be removed manually. For more information on the clamping process, read our guide to how injection moulding machines work for more.
Flash is almost always caused by either too weak a clamping force or the ejector pins being poorly treated. Too weak a clamping force means molten plastic is not coerced to stay in shape. As a result, the plastic escapes via the route of least resistance. Additionally, ejector pins pushed past their tolerance through wear and tear or exposure to too high temperatures cannot do their job in the injection moulding process.
To avoid flash, review your ejector pins that are holding your moulds together during the injection moulding process and make sure that the clamping force is correctly set. If you are still having problems, or are having issues with your plastic injection moulding process that we have not described, please get in touch, and our team will be happy to help you find the solution to your problems.
To ensure that your injection moulding projects are completed without faults, use a trusted and professional plastic injection moulding service, such as that offered here at Opus Plastics. If you would like to learn more about the ways in which your business could benefit from our plastic moulding expertise, then please do not hesitate to get in touch.